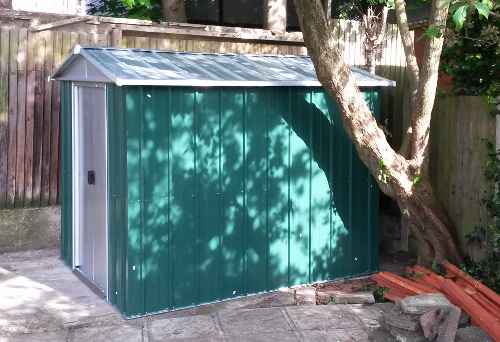
Over the weekend I helped my dad to build a new shed for his garden. The old one was made of wood and had started to rot so he bought a new one, made of metal. Building it was pretty much a case of following the instructions to put all the bits in the right places in the right order.

The instructions were…OK. They were not all that clear in some places, with some careful figuring out needed to make sure we were doing things right. Sometimes we got them wrong and had to backtrack, taking off some pieces so we could put the correct piece on first. I’ve built a fair bit of self-assembly furniture in my time, and this kind of thing often seems to happen there too. I call it ‘the crisis’: that moment when you realise you’ve gone wrong and you’re going to have to undo the last few steps to get back on track.
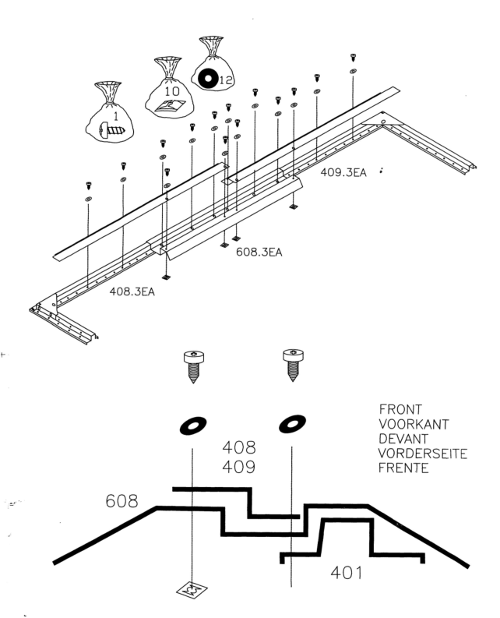
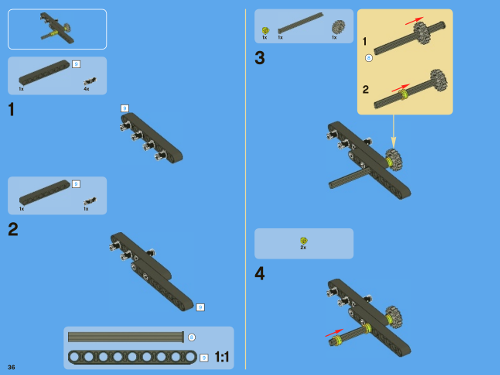
There’s a real art to making clear step-by-step building instructions. When it comes to clarity and unambiguity, Lego outshines everything else. The shed instructions would sometimes show a couple of screws going in, but when we looked at the pieces there were several more holes. Should we screw these too? Or were they deliberately left empty for something else to go in there later? We were never sure. Lego never leaves you with these ambiguities. Every addition to the structure is shown explicitly. They also have much higher production values, with their beautiful full colour 3D diagrams. With Lego, the instructions really are the product. It’s the building process that is the most fun part, whereas for a shed the build is soon forgotten, and it’s the long term usefulness of the shed that’s most important.
Compared to Lego, where each additional piece fits neatly onto the existing structure, this shed was a bit more analogue. Often there would be parts that were supposed to be screwed together, but the holes didn’t quite line up. Various amounts of pushing and pulling were required to get things lined up enough for the screws to fit. The manufacturing quality, in terms of sizes of parts and exact positions of holes, was just about good enough for the shed to work, but it didn’t make it that easy.

Philips screws. Good in theory…
All the screw heads were Philips. I hate Philips screws! The idea is that you can apply greater torque to the screw head than you can with a single slotted screw, because the screwdriver is in contact with more of the screw head. Sounds good in theory, and it works OK when you’re screwing into something easy. But if you’re trying to screw into something hard, or trying to remove a screw that has rusted in place, what happens is that the action of screwing ends up grinding down the inside of the screw head until you get a circular hole. This is not helped by the fact that screws tend to be soft, while screwdrivers are hard. Now you can’t apply any torque, and the screwdriver just spins in the top of the screw. I don’t understand why this type of screw has become so ubiquitous!

…until this happens
We got the shed finished without too many problems though. I really like building things like this. Following the instructions step-by-step and seeing the construction take shape is very satisfying.